Gallery
How to add up to 30 photos of your business, choose a cover photo, arrange the order and categories, and where clients see them.

The gallery holds photos of your space, team and work that clients see on your public page and in the Appointa app. People choose with their eyes, so a good gallery often decides whether someone books. Here you'll learn how to add photos, which limits apply, how to choose a cover photo, arrange the order and categories, and how to delete a photo.
Before you start
- The gallery can be edited by users with the Owner and Manager roles. Staff don't have Gallery in their menu.
- The gallery is available on all plans.
- Prepare your photos in JPG, PNG or WebP format, up to 5 MB each. You don't need to shrink them.
Where photos appear
| Place | How they appear |
|---|---|
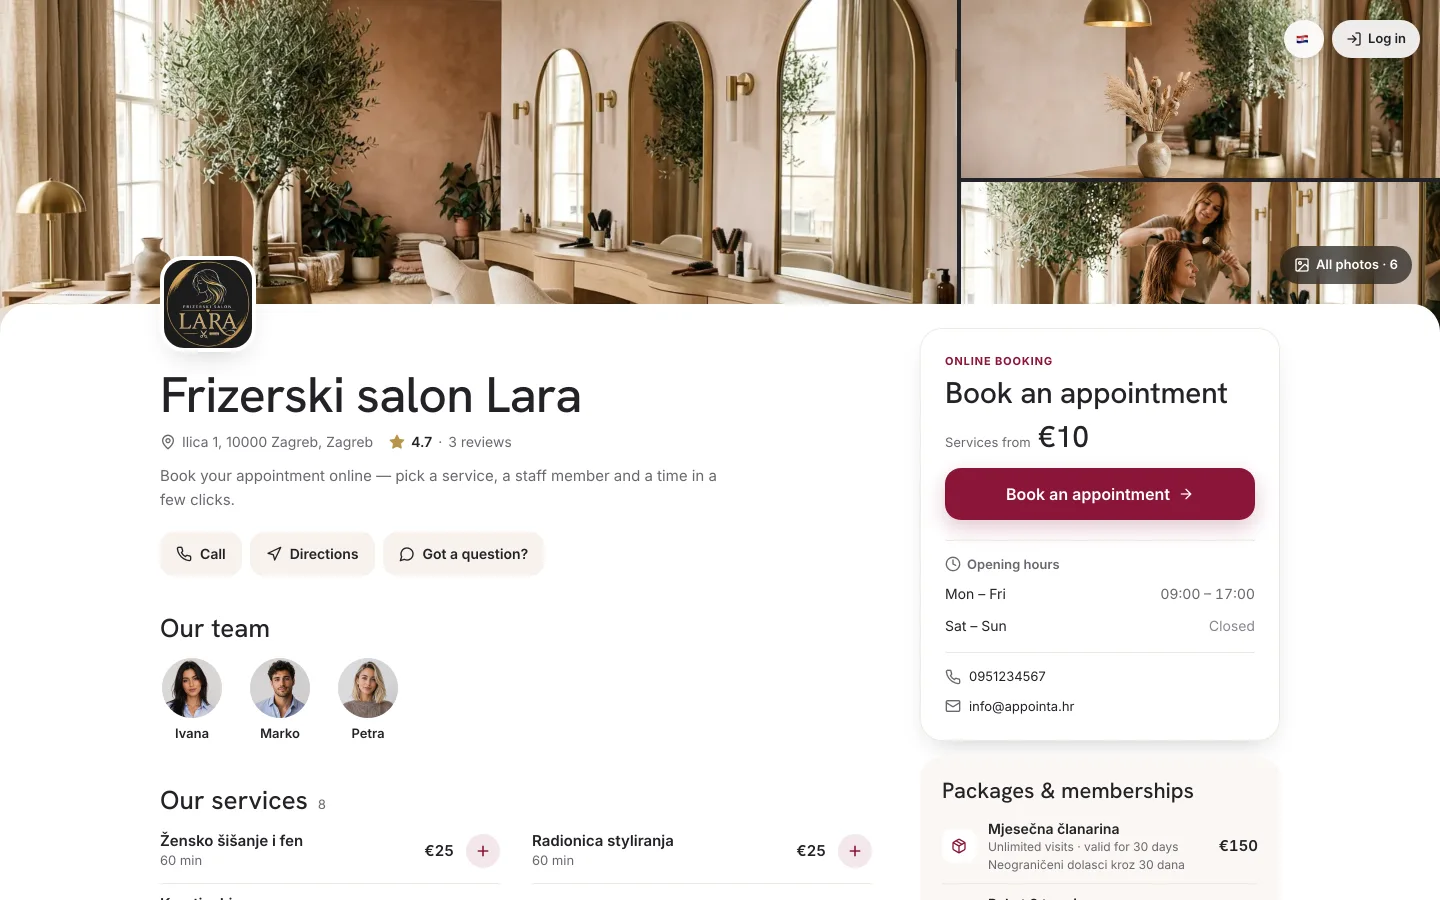
| Public page, header | The cover photo, full width, behind your business name. |
| Public page, Gallery section | All photos in the order you set, including the cover. On a computer in a grid, on a phone in a horizontal row you swipe through. Clicking one opens a full-screen viewer with arrows and thumbnails. |
| Appointa app | A row of thumbnails on your business page, with the cover first. Tapping one opens a full-screen viewer. |
Without any photos, the header of your public page is filled with your brand color and the Gallery section isn't shown. If you haven't marked any photo as the cover, the first photo in the gallery is shown in the header.
Opening the gallery
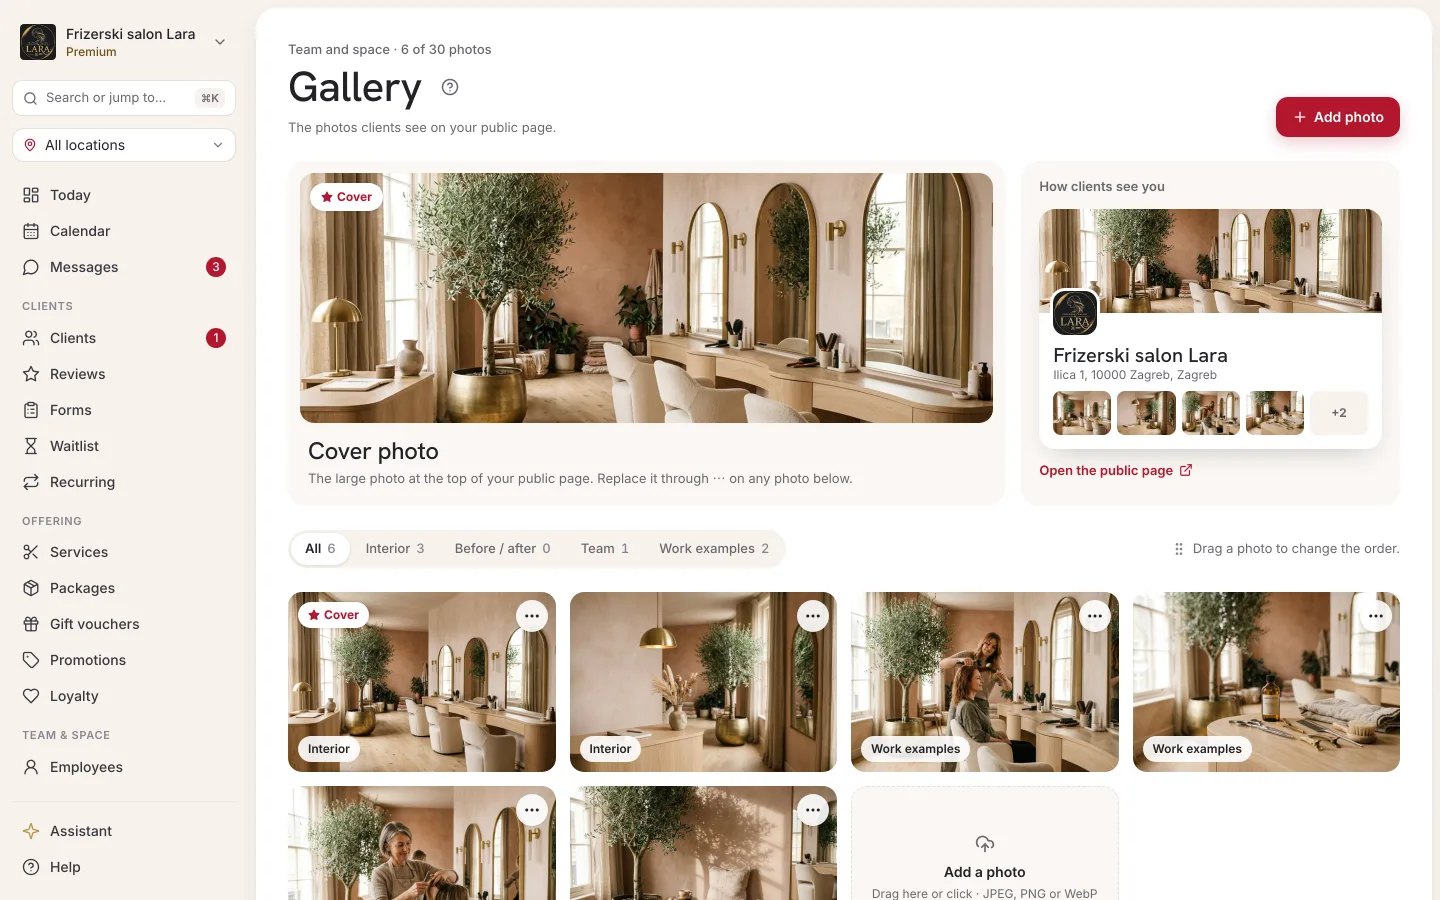
In the sidebar, choose Gallery. At the top is a counter, e.g. “6 / 30 photos”, below it the category filters, then the photo grid, and at the bottom the Add photo field.
Adding photos
- Open Gallery.
- Drag a photo onto the Add photo field at the bottom of the page, or click the field and choose a file.
- Wait for the photo to upload. It appears at the end of the grid with the Interior category.
- If needed, change its category, set it as the cover or move it.
Photos are added one at a time. Repeat the steps for the next one.
| Limit | Value |
|---|---|
| Maximum number of photos | 30 per business |
| Maximum file size | 5 MB |
| Formats | JPG, PNG, WebP |
| Processing | Each photo is automatically resized to at most 1600 pixels on the longer side and saved as JPG, so it loads quickly for clients. |
When you reach 30 photos, the upload field locks. To add a new photo, first delete an existing one.
| Message | What to do |
|---|---|
| Photo exceeds 5 MB. | Make the photo smaller or save it at a lower quality, then try again. |
| Unsupported format. Use JPG, PNG, or WebP. | Save the photo in one of those formats. A photo in HEIC format, common on iPhone, needs to be saved as JPG first. |
| Maximum 30 photos per business. | Delete a photo you no longer need. |
| Upload failed. Please try again. | Check your internet connection and try again. |
Cover photo
The cover photo is the large image at the top of your public page, behind your business name and logo.
- Find the photo in the grid.
- Click Set as cover below it.
The photo gets the COVER badge in its top-left corner, and its Set as cover button becomes inactive. There can only be one cover: when you choose a new one, the previous one stops being the cover but stays in the gallery.
Order
The order in the grid is the order in which clients see your photos.
- Grab a photo with your mouse.
- Drag it onto the position of another photo and let go.
The new order is saved immediately. Clients see the first photos without scrolling, so put the kind of work you most want to do at the start.
Categories
Each photo has one category: Interior, Before / after, Team or Work examples. A new photo gets Interior.
- Click the category label with the pencil icon in the top-right corner of the photo.
- In the menu, choose the new category. The current one is marked with a check mark.
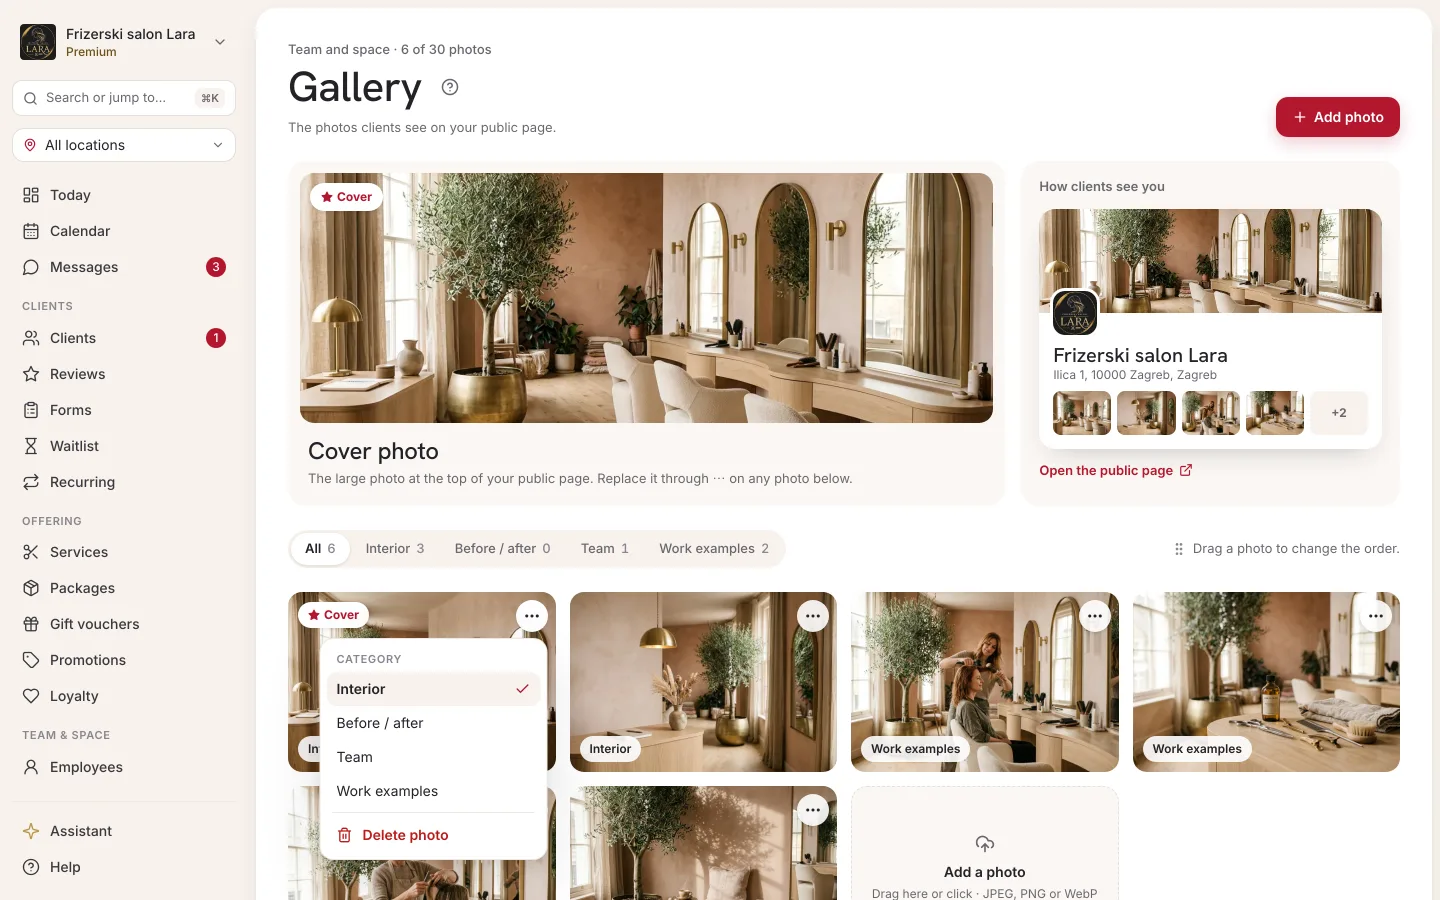
The filters above the grid (All and one per category) show only the photos in the selected category. They're there to help you review your photos and don't change what clients see. Categories aren't shown on the public page.
Deleting
- Click the trash icon below the photo.
- In the Delete this photo? window, confirm with Yes, delete or back out with Cancel.
What clients see
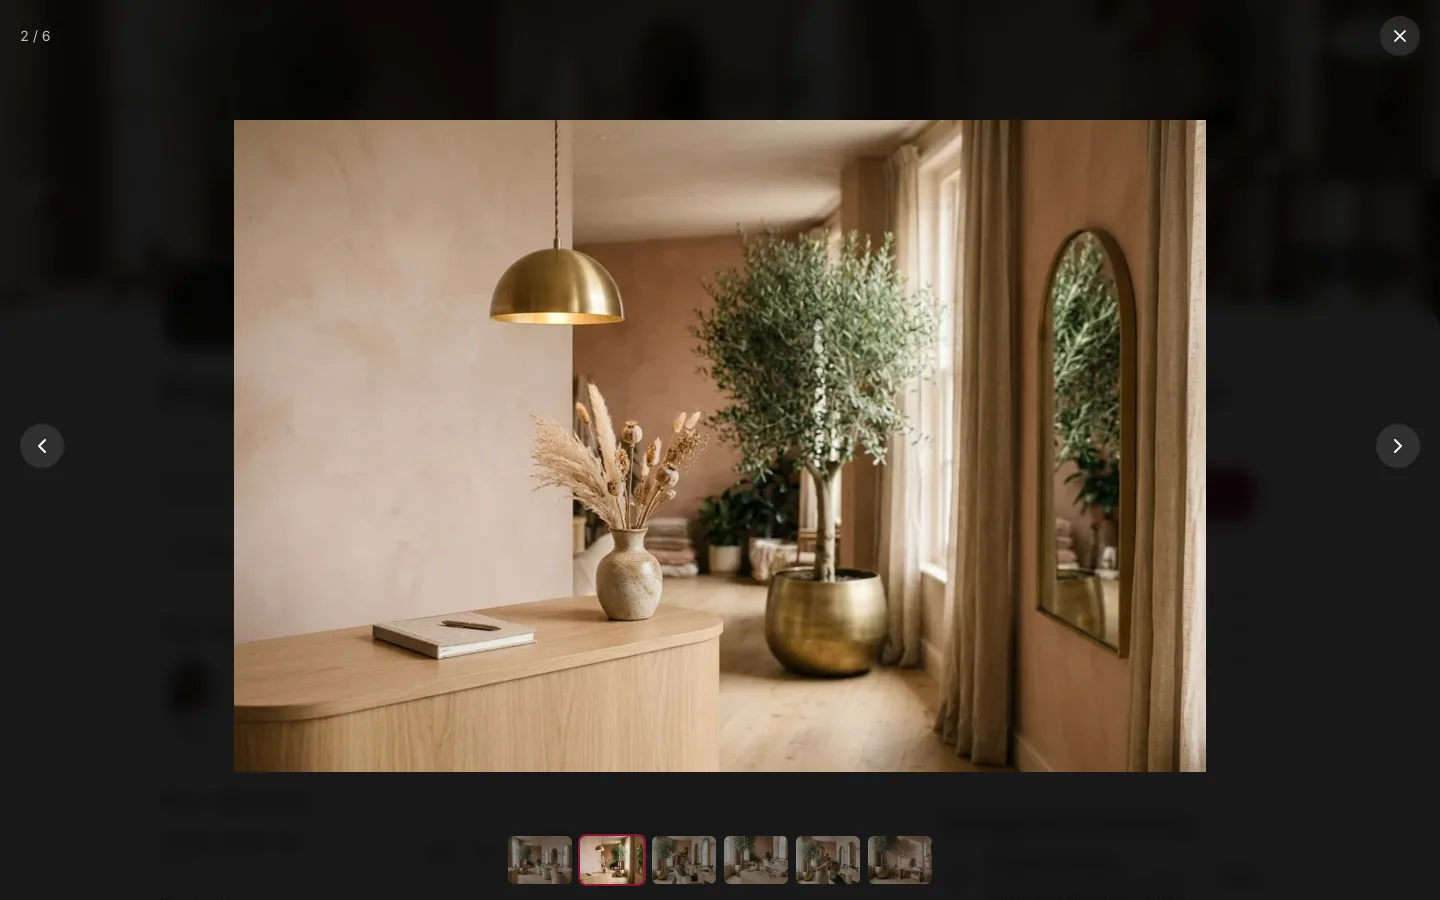
Clicking a photo opens a full-screen viewer on a dark background. The client browses with the on-screen arrows or the arrow keys, picks a photo from the row of thumbnails below and closes the viewer with the × button or the Esc key.
Tips for good photos
- Shoot in daylight or under strong, even light. A phone is perfectly fine.
- Keep the background calm and tidy, without cables, towels or packaging.
- Show variety: your space, your team at work and a few of your best pieces of work.
- Replace old photos with new ones at least once a season.
- Don't put text, prices or discounts in photos. Clients see prices next to your services, and special offers belong in promotions.
Frequently asked questions
Can I add a caption to photos?
No. The gallery currently has no field for a photo caption. Let the photo and its category speak for themselves.
Can I add several photos at once?
No, photos are added one at a time. Each one appears on your public page immediately.
Why is the cover photo cropped differently on a phone than on a computer?
The header fills the full width of the screen, so on a narrow phone screen you see a narrower slice of the same photo. Choose a photo with its main subject in the middle.
Can I edit the gallery in the Appointa Pro app?
No. The Appointa Pro app has no gallery, so you add and edit photos in the web admin. Clients see them both on your public page and in the Appointa app.
Is the gallery the same as the logo?
No. You set your logo in your business settings, and it appears above your business name on the public page and in the link preview. The gallery holds photos of your space and work.